こんにちは! けい(Twitter)です。
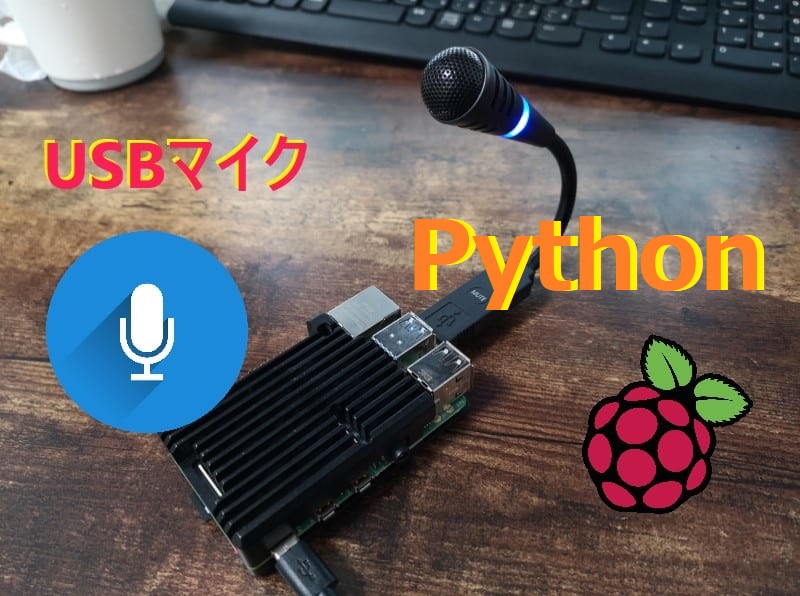
今回は、ラズパイに接続したUSBマイクからの音声をPythonで取得する方法についてまとめていきたいと思います。
前回はコマンドラインでマイク音声を録音&再生したので、そちらの記事も載せておきます。
目次
必要なもの
ラズパイ

USBマイク
ラズパイで動作するマイクを使用します。

PyAudioのインストール
Pythonで、USBマイクからの音声信号を取得するために、PyAudioをインストールします。
PyAudioはPythonでオーディオ機器を制御するのに便利なライブラリです。
では、インストールしていきましょう。
次のコマンドをターミナルで実行します。
$ sudo pip3 install pyaudio
$ sudo apt install libportaudio0 libportaudio2 libportaudiocpp0 portaudio19-dev
一行目がpipコマンドでpyaudioをインストールしています。
2行目は、pyaudioを使用するために必要なライブラリをインストールしています。
今回私は、pipコマンドでインストールしましたが、aptコマンドでインストールすれば、必要なライブラリも自動的にインストールしてくれるようなので、aptコマンドの方がいいかも。
一応aptコマンドだと次のコマンドでインストールできます。
*上の2つのコマンドを実行したらこのコマンドは実行しなくても大丈夫です。
$ sudo apt install python3-pyaudioマイクの接続番号を確認
では、USBマイクをラズパイに挿してください。
ラズパイがUSBマイクを何番のデバイスとして認識しているかを確認する必要があります。
この番号は、USBマイクで録音する時に必要になります。
次のpythonプログラムを適当な名前で保存して、実行してください。
import pyaudio
p = pyaudio.PyAudio()
for i in range(p.get_device_count()):
    print(p.get_device_info_by_index(i))
ずらーっとこのような文字が表示されます。
{'index': 0, 'structVersion': 2, 'name': 'bcm2835 HDMI 1: - (hw:0,0)', 'hostApi': 0, 'maxInputChannels': 0, 'maxOutputChannels': 8, 'defaultLowInputLatency': -1.0, 'defaultLowOutputLatency': 0.0016099773242630386, 'defaultHighInputLatency': -1.0, 'defaultHighOutputLatency': 0.034829931972789115, 'defaultSampleRate': 44100.0}
{'index': 1, 'structVersion': 2, 'name': 'bcm2835 Headphones: - (hw:1,0)', 'hostApi': 0, 'maxInputChannels': 0, 'maxOutputChannels': 8, 'defaultLowInputLatency': -1.0, 'defaultLowOutputLatency': 0.0016099773242630386, 'defaultHighInputLatency': -1.0, 'defaultHighOutputLatency': 0.034829931972789115, 'defaultSampleRate': 44100.0}
{'index': 2, 'structVersion': 2, 'name': 'USB Microphone: Audio (hw:2,0)', 'hostApi': 0, 'maxInputChannels': 1, 'maxOutputChannels': 0, 'defaultLowInputLatency': 0.008684807256235827, 'defaultLowOutputLatency': -1.0, 'defaultHighInputLatency': 0.034829931972789115, 'defaultHighOutputLatency': -1.0, 'defaultSampleRate': 44100.0}
{'index': 3, 'structVersion': 2, 'name': 'sysdefault', 'hostApi': 0, 'maxInputChannels': 0, 'maxOutputChannels': 128, 'defaultLowInputLatency': -1.0, 'defaultLowOutputLatency': 0.0016099773242630386, 'defaultHighInputLatency': -1.0, 'defaultHighOutputLatency': 0.034829931972789115, 'defaultSampleRate': 44100.0}
{'index': 4, 'structVersion': 2, 'name': 'lavrate', 'hostApi': 0, 'maxInputChannels': 0, 'maxOutputChannels': 128, 'defaultLowInputLatency': -1.0, 'defaultLowOutputLatency': 0.0016099773242630386, 'defaultHighInputLatency': -1.0, 'defaultHighOutputLatency': 0.034829931972789115, 'defaultSampleRate': 44100.0}
{'index': 5, 'structVersion': 2, 'name': 'samplerate', 'hostApi': 0, 'maxInputChannels': 0, 'maxOutputChannels': 128, 'defaultLowInputLatency': -1.0, 'defaultLowOutputLatency': 0.0016099773242630386, 'defaultHighInputLatency': -1.0, 'defaultHighOutputLatency': 0.034829931972789115, 'defaultSampleRate': 44100.0}
{'index': 6, 'structVersion': 2, 'name': 'speexrate', 'hostApi': 0, 'maxInputChannels': 0, 'maxOutputChannels': 128, 'defaultLowInputLatency': -1.0, 'defaultLowOutputLatency': 0.0016099773242630386, 'defaultHighInputLatency': -1.0, 'defaultHighOutputLatency': 0.034829931972789115, 'defaultSampleRate': 44100.0}
{'index': 7, 'structVersion': 2, 'name': 'pulse', 'hostApi': 0, 'maxInputChannels': 32, 'maxOutputChannels': 32, 'defaultLowInputLatency': 0.008684807256235827, 'defaultLowOutputLatency': 0.00873015873015873, 'defaultHighInputLatency': 0.034807256235827665, 'defaultHighOutputLatency': 0.034829931972789115, 'defaultSampleRate': 44100.0}
{'index': 8, 'structVersion': 2, 'name': 'upmix', 'hostApi': 0, 'maxInputChannels': 0, 'maxOutputChannels': 8, 'defaultLowInputLatency': -1.0, 'defaultLowOutputLatency': 0.0015419501133786847, 'defaultHighInputLatency': -1.0, 'defaultHighOutputLatency': 0.034829931972789115, 'defaultSampleRate': 44100.0}
{'index': 9, 'structVersion': 2, 'name': 'vdownmix', 'hostApi': 0, 'maxInputChannels': 0, 'maxOutputChannels': 6, 'defaultLowInputLatency': -1.0, 'defaultLowOutputLatency': 0.0015419501133786847, 'defaultHighInputLatency': -1.0, 'defaultHighOutputLatency': 0.034829931972789115, 'defaultSampleRate': 44100.0}
{'index': 10, 'structVersion': 2, 'name': 'dmix', 'hostApi': 0, 'maxInputChannels': 0, 'maxOutputChannels': 2, 'defaultLowInputLatency': -1.0, 'defaultLowOutputLatency': 0.021333333333333333, 'defaultHighInputLatency': -1.0, 'defaultHighOutputLatency': 0.021333333333333333, 'defaultSampleRate': 48000.0}
{'index': 11, 'structVersion': 2, 'name': 'default', 'hostApi': 0, 'maxInputChannels': 32, 'maxOutputChannels': 32, 'defaultLowInputLatency': 0.008684807256235827, 'defaultLowOutputLatency': 0.00873015873015873, 'defaultHighInputLatency': 0.034807256235827665, 'defaultHighOutputLatency': 0.034829931972789115, 'defaultSampleRate': 44100.0}indexの番号が1から11まであることが分かります。
このindexの番号がデバイスの番号を示しています。
さらに、index:2に、’USB Microphone: Audio (hw:2,0)’という名前のデバイスがあることが分かります。
これがUSBマイクです。デバイス番号が2であることが分かりました。
比較のためにUSBマイクを接続する前に、pythonプログラムを実行したときの結果を貼っておきます。
{'index': 0, 'structVersion': 2, 'name': 'bcm2835 HDMI 1: - (hw:0,0)', 'hostApi': 0, 'maxInputChannels': 0, 'maxOutputChannels': 8, 'defaultLowInputLatency': -1.0, 'defaultLowOutputLatency': 0.0016099773242630386, 'defaultHighInputLatency': -1.0, 'defaultHighOutputLatency': 0.034829931972789115, 'defaultSampleRate': 44100.0}
{'index': 1, 'structVersion': 2, 'name': 'bcm2835 Headphones: - (hw:1,0)', 'hostApi': 0, 'maxInputChannels': 0, 'maxOutputChannels': 8, 'defaultLowInputLatency': -1.0, 'defaultLowOutputLatency': 0.0016099773242630386, 'defaultHighInputLatency': -1.0, 'defaultHighOutputLatency': 0.034829931972789115, 'defaultSampleRate': 44100.0}
{'index': 2, 'structVersion': 2, 'name': 'sysdefault', 'hostApi': 0, 'maxInputChannels': 0, 'maxOutputChannels': 128, 'defaultLowInputLatency': -1.0, 'defaultLowOutputLatency': 0.0016099773242630386, 'defaultHighInputLatency': -1.0, 'defaultHighOutputLatency': 0.034829931972789115, 'defaultSampleRate': 44100.0}
{'index': 3, 'structVersion': 2, 'name': 'lavrate', 'hostApi': 0, 'maxInputChannels': 0, 'maxOutputChannels': 128, 'defaultLowInputLatency': -1.0, 'defaultLowOutputLatency': 0.0016099773242630386, 'defaultHighInputLatency': -1.0, 'defaultHighOutputLatency': 0.034829931972789115, 'defaultSampleRate': 44100.0}
{'index': 4, 'structVersion': 2, 'name': 'samplerate', 'hostApi': 0, 'maxInputChannels': 0, 'maxOutputChannels': 128, 'defaultLowInputLatency': -1.0, 'defaultLowOutputLatency': 0.0016099773242630386, 'defaultHighInputLatency': -1.0, 'defaultHighOutputLatency': 0.034829931972789115, 'defaultSampleRate': 44100.0}
{'index': 5, 'structVersion': 2, 'name': 'speexrate', 'hostApi': 0, 'maxInputChannels': 0, 'maxOutputChannels': 128, 'defaultLowInputLatency': -1.0, 'defaultLowOutputLatency': 0.0016099773242630386, 'defaultHighInputLatency': -1.0, 'defaultHighOutputLatency': 0.034829931972789115, 'defaultSampleRate': 44100.0}
{'index': 6, 'structVersion': 2, 'name': 'pulse', 'hostApi': 0, 'maxInputChannels': 32, 'maxOutputChannels': 32, 'defaultLowInputLatency': 0.008684807256235827, 'defaultLowOutputLatency': 0.00873015873015873, 'defaultHighInputLatency': 0.034807256235827665, 'defaultHighOutputLatency': 0.034829931972789115, 'defaultSampleRate': 44100.0}
{'index': 7, 'structVersion': 2, 'name': 'upmix', 'hostApi': 0, 'maxInputChannels': 0, 'maxOutputChannels': 8, 'defaultLowInputLatency': -1.0, 'defaultLowOutputLatency': 0.0015419501133786847, 'defaultHighInputLatency': -1.0, 'defaultHighOutputLatency': 0.034829931972789115, 'defaultSampleRate': 44100.0}
{'index': 8, 'structVersion': 2, 'name': 'vdownmix', 'hostApi': 0, 'maxInputChannels': 0, 'maxOutputChannels': 6, 'defaultLowInputLatency': -1.0, 'defaultLowOutputLatency': 0.0015419501133786847, 'defaultHighInputLatency': -1.0, 'defaultHighOutputLatency': 0.034829931972789115, 'defaultSampleRate': 44100.0}
{'index': 9, 'structVersion': 2, 'name': 'dmix', 'hostApi': 0, 'maxInputChannels': 0, 'maxOutputChannels': 2, 'defaultLowInputLatency': -1.0, 'defaultLowOutputLatency': 0.021333333333333333, 'defaultHighInputLatency': -1.0, 'defaultHighOutputLatency': 0.021333333333333333, 'defaultSampleRate': 48000.0}
{'index': 10, 'structVersion': 2, 'name': 'default', 'hostApi': 0, 'maxInputChannels': 32, 'maxOutputChannels': 32, 'defaultLowInputLatency': 0.008684807256235827, 'defaultLowOutputLatency': 0.00873015873015873, 'defaultHighInputLatency': 0.034807256235827665, 'defaultHighOutputLatency': 0.034829931972789115, 'defaultSampleRate': 44100.0}
indexが、1から10までであることが分かります。
つまり、接続後は一つ増えています。
PyAudioで録音するプログラム
それでは、Pythonで録音するプログラムを見ていきましょう。
import pyaudio
import wave

form_1 = pyaudio.paInt16 # 16-bit resolution
chans = 1 # 1 channel
samp_rate = 44100 # 44.1kHz サンプリング周波数
chunk = 4096 # 2^12 一度に取得するデータ数
record_secs = 3 # 録音する秒数
dev_index = 2 # デバイス番号
wav_output_filename = 'test.wav' # 出力するファイル

audio = pyaudio.PyAudio() # create pyaudio instantiation

# create pyaudio stream
stream = audio.open(format = form_1,rate = samp_rate,channels = chans, \
                    input_device_index = dev_index,input = True, \
                    frames_per_buffer=chunk)
print("recording")
frames = []

# loop through stream and append audio chunks to frame array
for i in range(0,int((samp_rate/chunk)*record_secs)):
    data = stream.read(chunk)
    frames.append(data)

print("finished recording")

# stop the stream, close it, and terminate the pyaudio instantiation
stream.stop_stream()
stream.close()
audio.terminate()

# save the audio frames as .wav file
wavefile = wave.open(wav_output_filename,'wb')
wavefile.setnchannels(chans)
wavefile.setsampwidth(audio.get_sample_size(form_1))
wavefile.setframerate(samp_rate)
wavefile.writeframes(b''.join(frames))
wavefile.close()
プログラム解説
大事な部分を見ていきます。
9行目:デバイス番号
ここは先ほど調べたデバイスの番号とします。
22行~:音声の取得
22~24行で音声データを配列に取得しています。
34行~:音声データの書き出し
音声データを配列のまま保存することはできないので、音声データのフォーマットとして保存する必要があります。
その処理を担っている部分です。
録音した音声の再生
それでは上のプログラムで録音した音声ファイル「test.wav」を再生してみましょう。
上のpythonファイルと同じディレクトリ内に保存されます。
そのディレクトリに移動します。
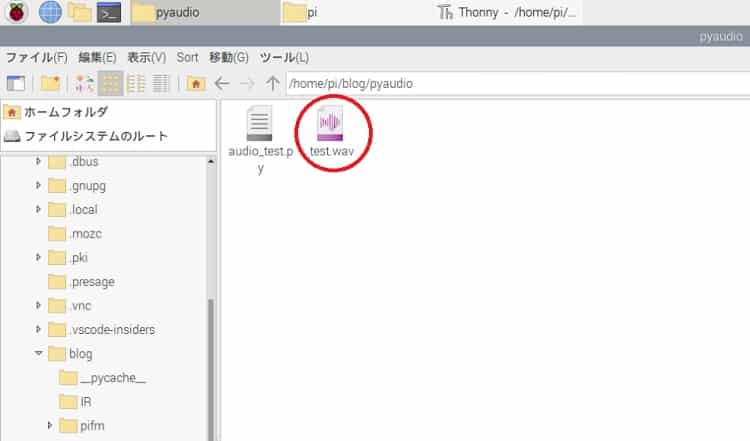
「test.wav」をダブルクリックすると音声が再生されるはずです。
もし、これで再生されない場合はコマンドからでも再生できます。
cdコマンドで「test.wav」がある場所まで移動した後、次のコマンドを実行します。
$ aplay test.wav音が出ない場合は、ラズパイ側の音声出力環境を見直してみて下さい。
私の場合は、「VNC Viewer」を使っていて、HDMIなどで画面出力しているわけではないので、音はラズパイに備わっている「A/V OUT」端子にイヤホンを接続しています。
HDMIをラズパイとディスプレイで接続している場合は、ディスプレイから音が出るかと思います。もし出ない場合は、youtubeなどを再生した場合に音が出るかどうか確認してみて下さい。